Fix “USB Device Not recognized” / Code 43 Error

I encountered this error on 2 different computers. All but one of my USB devices would work, and the port I plugged it into was fine, because other devices worked with it.

There were many posts about how to fix this issue on the internet, but none of them worked for me. I stumbled upon my own answer based off ideas of uninstalling the USB Controllers (close, but didn’t work for me). Try this simple fix below.

1) Open Device Manager
2) In “Universal Serial Bus controllers” delete all entries that are “USB root hub”. Unplug and re-insert any USB devices (mice or keyboard for example) that stop working, and when they’re active again continue uninstalling any remaining listings.

How To Fix GPS on T-Mobile Samsung Vibrant

UPDATE:

After switching ROMs and Kernals a few times, my GPS stopped working and the fix below didn’t help anymore.

chui101 created an amazing software patch that seems to fix my GPS issues without any complicated settings.  Try it out if you’re still having trouble with your Vibrant’s GPS.

———————————————

The Samsung Vibrant is hands down the best phone I’ve ever used, however it has a shortcoming in the GPS department.
The settings that come preloaded on the Samsung Vibrant for GPS are not optimal for trying to quickly connect to GPS.

Before making the changes below, I could only connect to GPS once per reboot of my phone.

1 – Disable “Use Wireless Networks” – Settings / Location & Security
2 – Dial *#*#3214789650#*#*
3 – Under “Application settings” Change “Operation Mode” to MS Based
4 – Under “SUPL/CP Settings” Change the SERVER & PORT to supl.google.com and port 7276 [ Do not use www. in front of supl]
5 – REBOOT

I also installed “GPS Status” which has a tool to Reset the local AGSP data, and redownload new data to help assist your phone finding the correct location.

The original GPS settings were:

Operation Mode: Standalone
Server: www.spirent-lcs.com
Port: 7275


After making these changes, I could now connect to GPS 3 different times, connecting under half a minute, all without requiring a single reboot of my phone.

Source and other alternative code if the above code doesn’t work on your firmware.
Windows Live Mail FINALLY Supports HTTPS/SSL + How to fix error 0x800040605

Up until l a week or two ago, if you enabled HTTPS in your Windows Live Hotmail account, you could not access your email through the Windows Live desktop client. This was a major security flaw, that Microsoft didn’t solve for a long time.

Thankfully, the latest version of Windows Live Mail finally will work with email accounts that have HTTPS permanently enabled via the web.

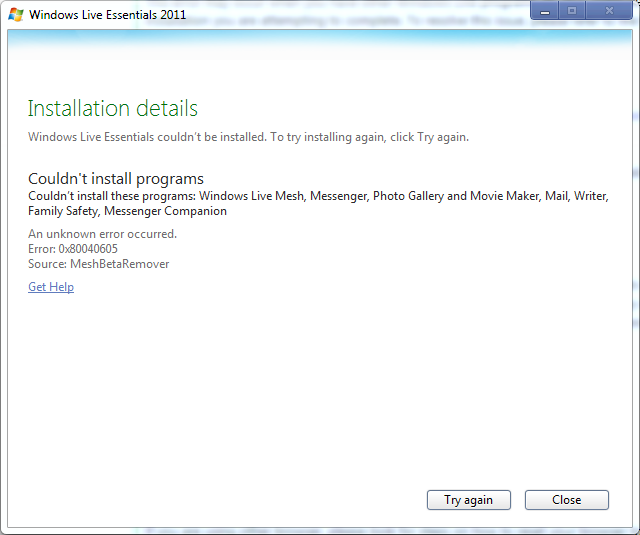
However, when I tried to download the latest version [link], the installer would give me the following error message.

I tried MANY different Windows Support threads on how to fix this and other Windows Live installation error, but found the only way to get rid of this error and solve the problem completely was to do the following:

  1. Go to my user profile directory and find the AppData Folder (Usually c:/Users/Username/AppData)
    If you don’t see that folder in Windows 7, you need to “Show hidden files, folders, and drives” in your “Folder and Search Options”.
  2. Delete all of the Local, LocalRow, and Roaming folders that were named:
    – Windows Live
    – Temp

While this worked for me, deleting these folders may have other consequences on other Windows Live Applications – delete those folders at your own risk with caution. If nothing else, just rename them so if you want you can change the name back to restore them like they were before.